Online Auto Company
Company
Shop By Category
T&Cs
Shop Online
  • Free delivery across Canada on orders over $100
  • Interior, exterior and roadside car accessories in one place
  • Dispatch within 2 working days, then delivery in up to 7 working days by tracked courier
  • Tracking number emailed as soon as your order ships

Headlight Lens Restorer Kit | Headlight Sanding Kit | Headlight Lens Cleaner Kit

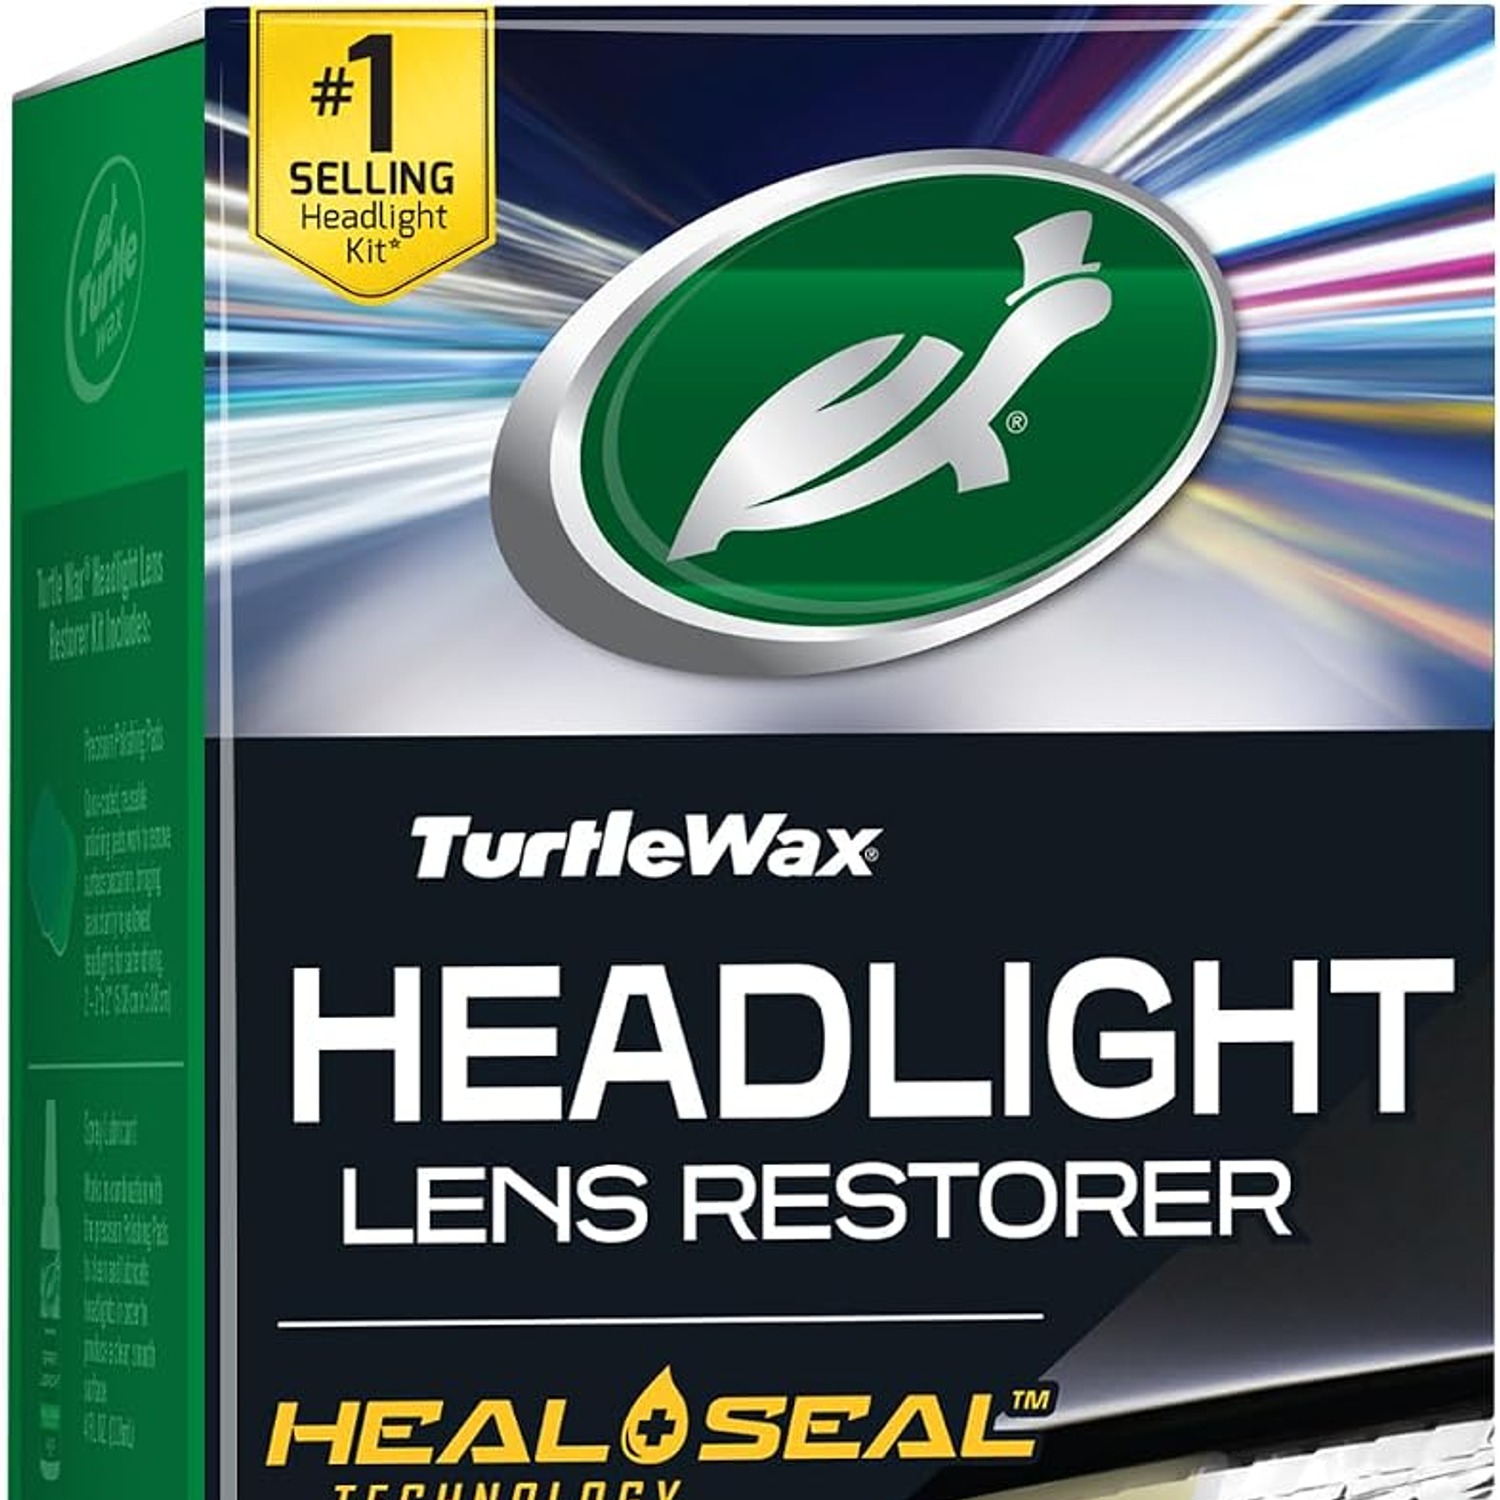
Headlight Lens Restorer Kit

$37.49 $44.99 Save $7.50
  • No Power Tools
  • Staged Pads
  • Clarifying Compound
  • Sealing Step

Price: $37.49 $44.99

  • Delivery time: up to 7 working days by tracked courier, after dispatch within 2 working days
  • Free delivery across Canada on orders $100+, otherwise a flat $25
  • Pay by card or PayPal, handled by the payment provider
  • 15 days to change your mind, plus a repair, replacement or refund if it arrives faulty
Product specifications
Kit ContentsMulti-stage restoration pads, spray lubricant, lens clarifying compound, lens sealing wipes
Tools NeededNone
Suitable SurfacesHeadlight lenses, plexiglass and plastic surfaces
Application MethodBy hand, wet sanding with lubricant then compound and seal
ConditionNew
Shipping & returns

Tracked delivery anywhere in Canada. It is free on orders of $100 or more, and a flat $25 below that. Allow up to 7 working days in transit after dispatch within 2 working days.

This shop's own returns policy gives you 15 days from purchase to change your mind, on every product it sells. Send it back in its original packaging with proof of purchase and we refund the price you paid for the goods, processed within 24 to 48 hours of the return arriving. You cover the cost of returning it unless the item is faulty.

If it arrives faulty, damaged or not as described, we put it right at no cost to you, return postage included, and your rights under the consumer protection law of your province or territory are unaffected.

Shipping details · Refunds and returns

No Power ToolsWorked by hand, so no drill or polisher is required.
Staged PadsWet restoration pads move from coarser to finer on deeper hazing.
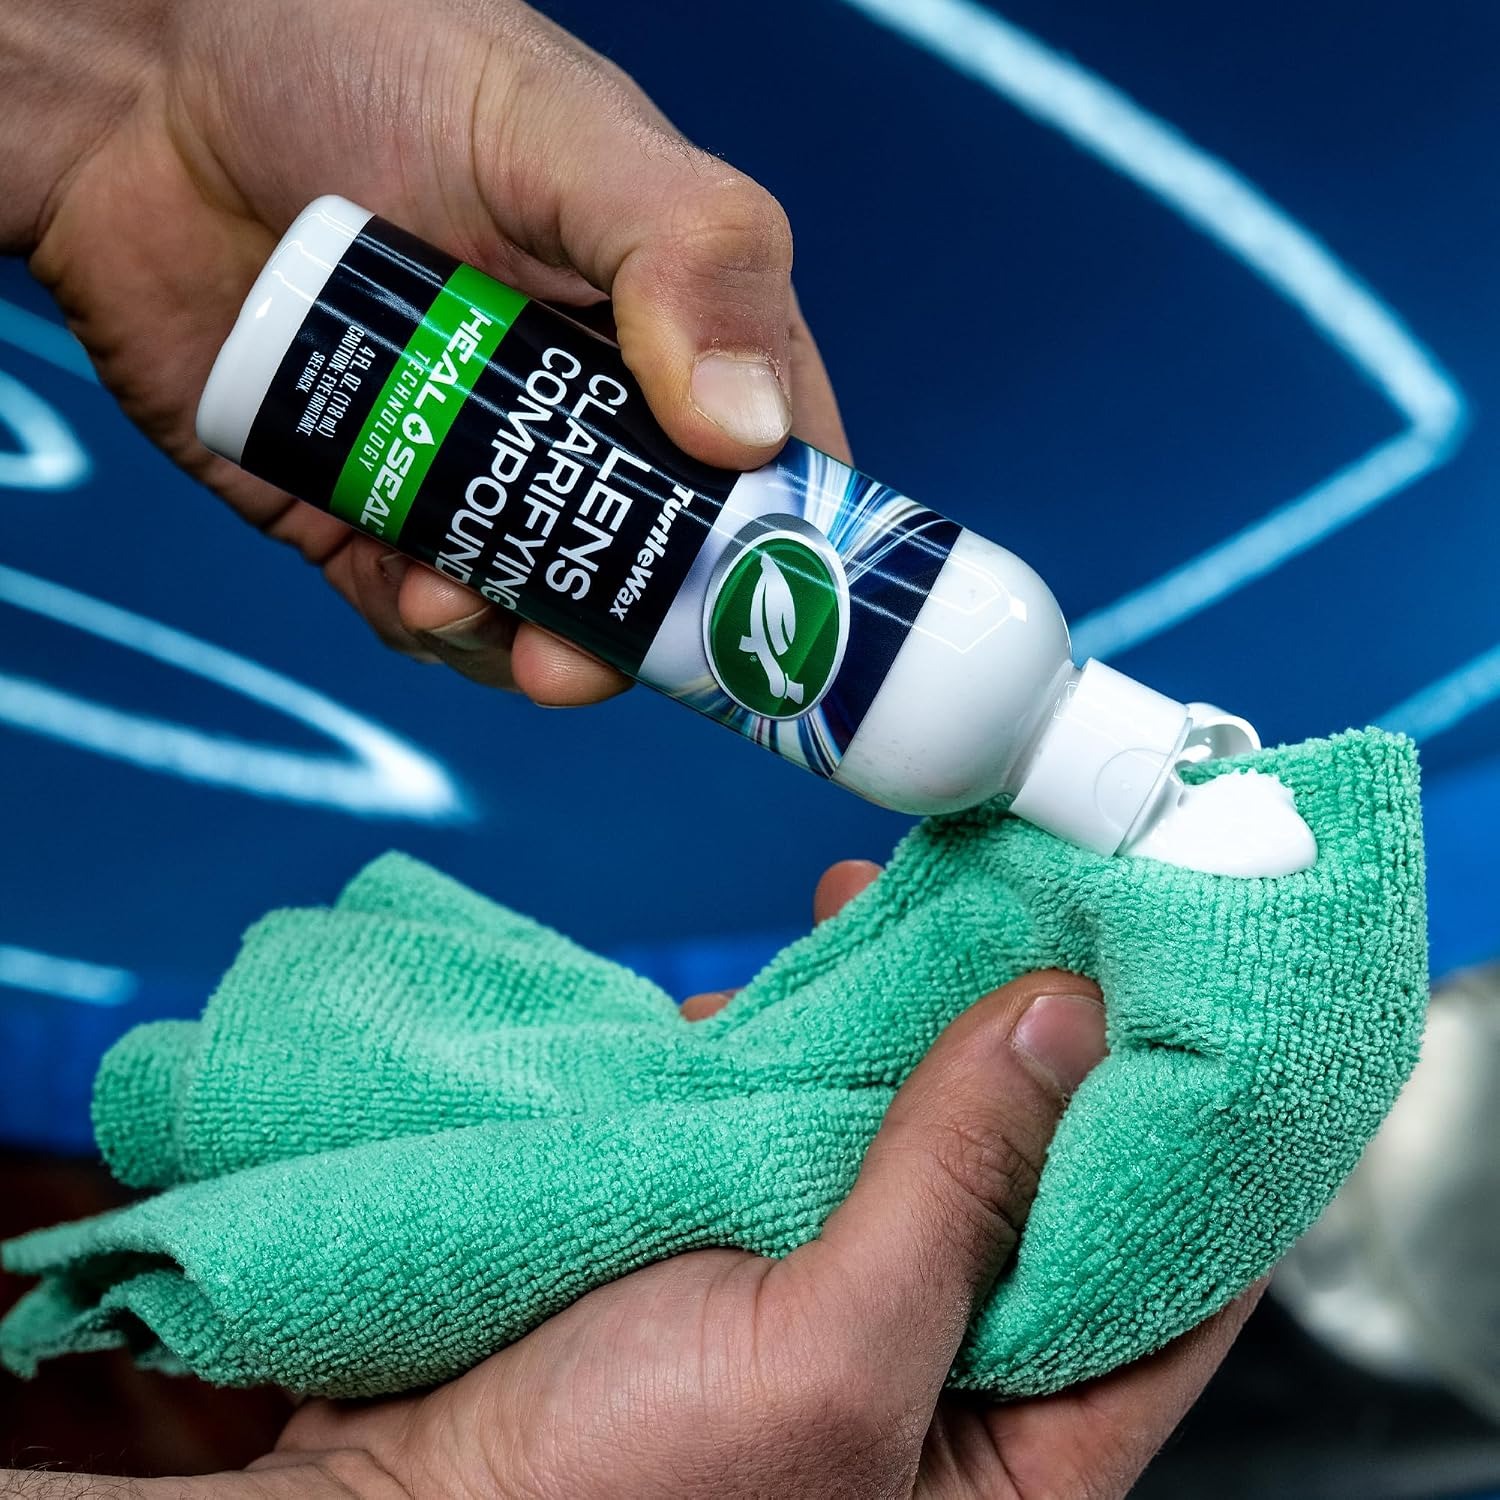
Clarifying CompoundLifts surface discolouration and may be enough on lightly hazed lenses.
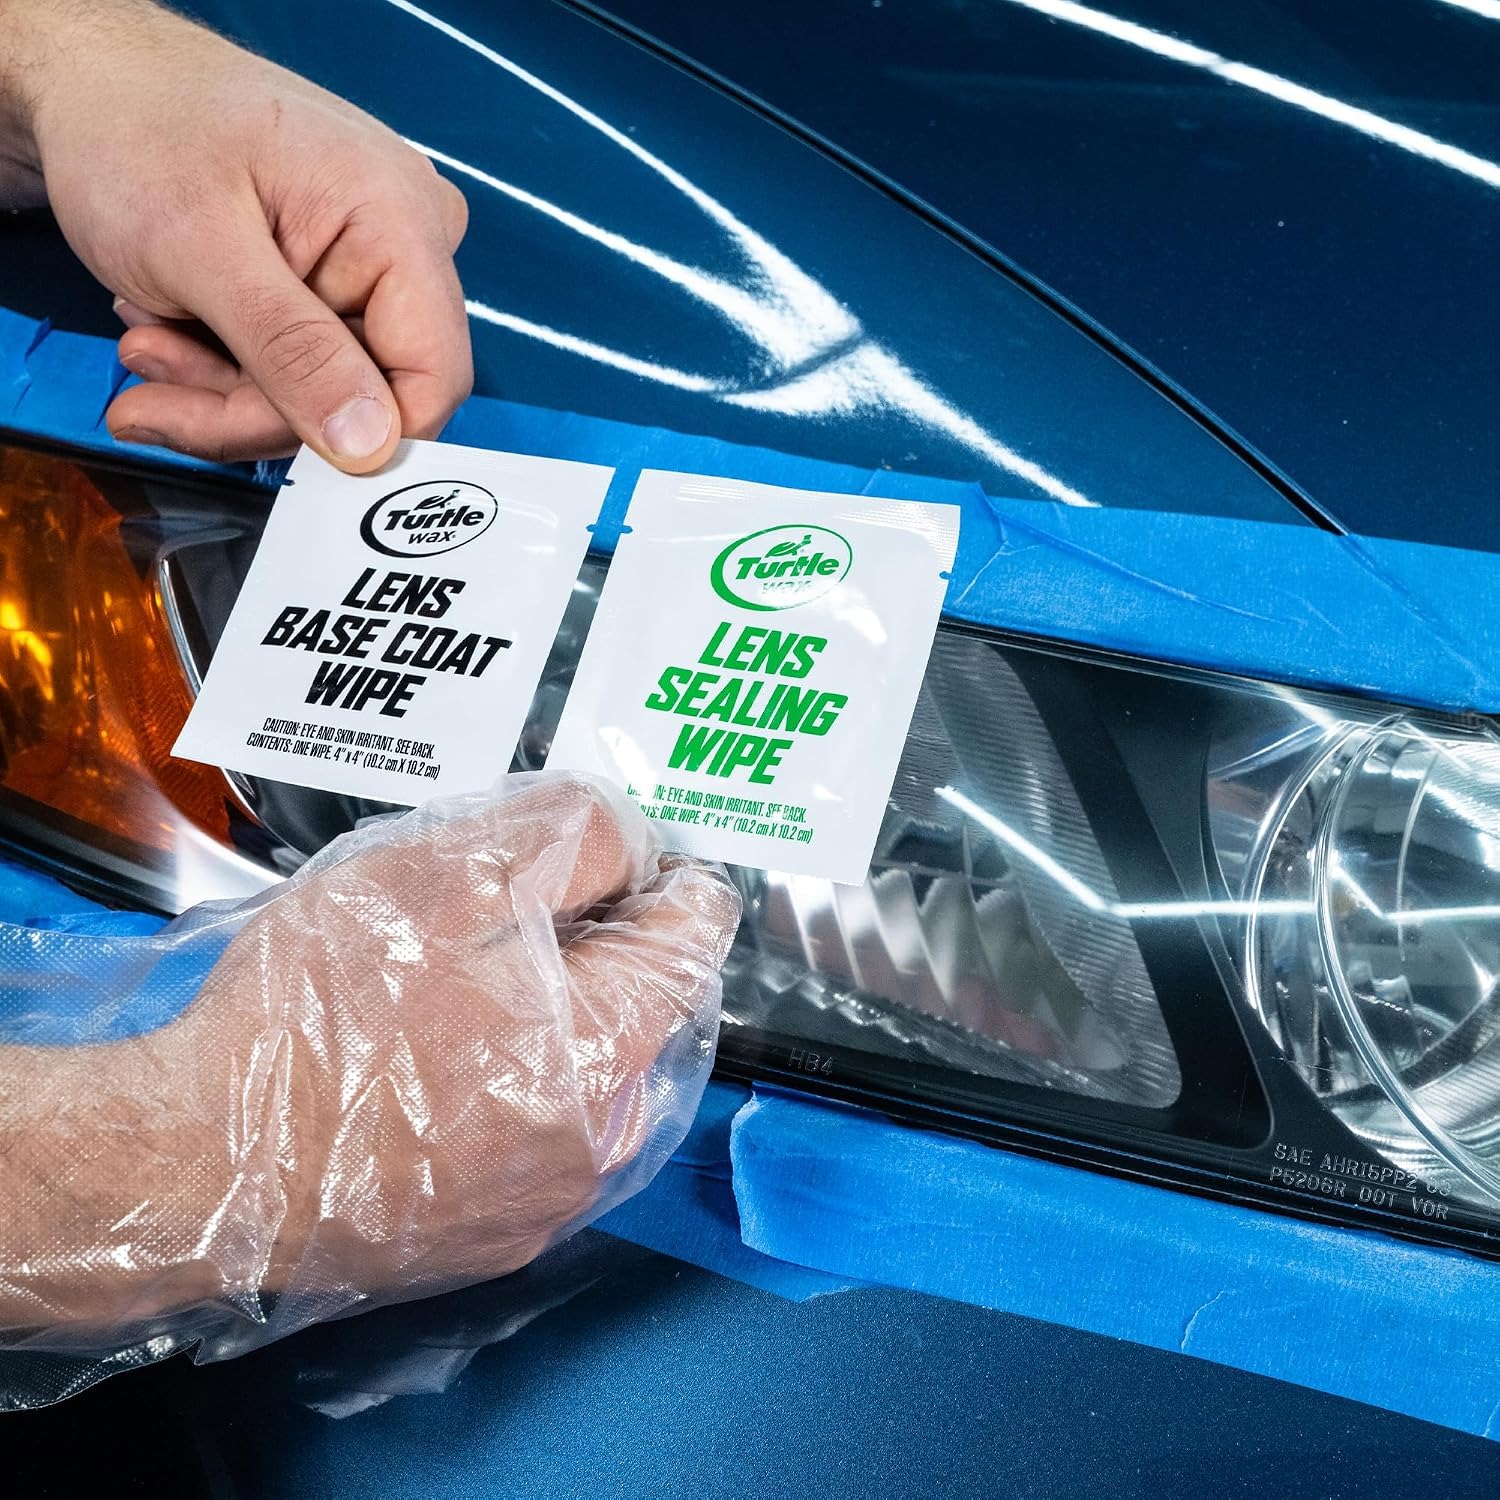
Sealing StepLens sealing wipes finish the job and help protect the surface.

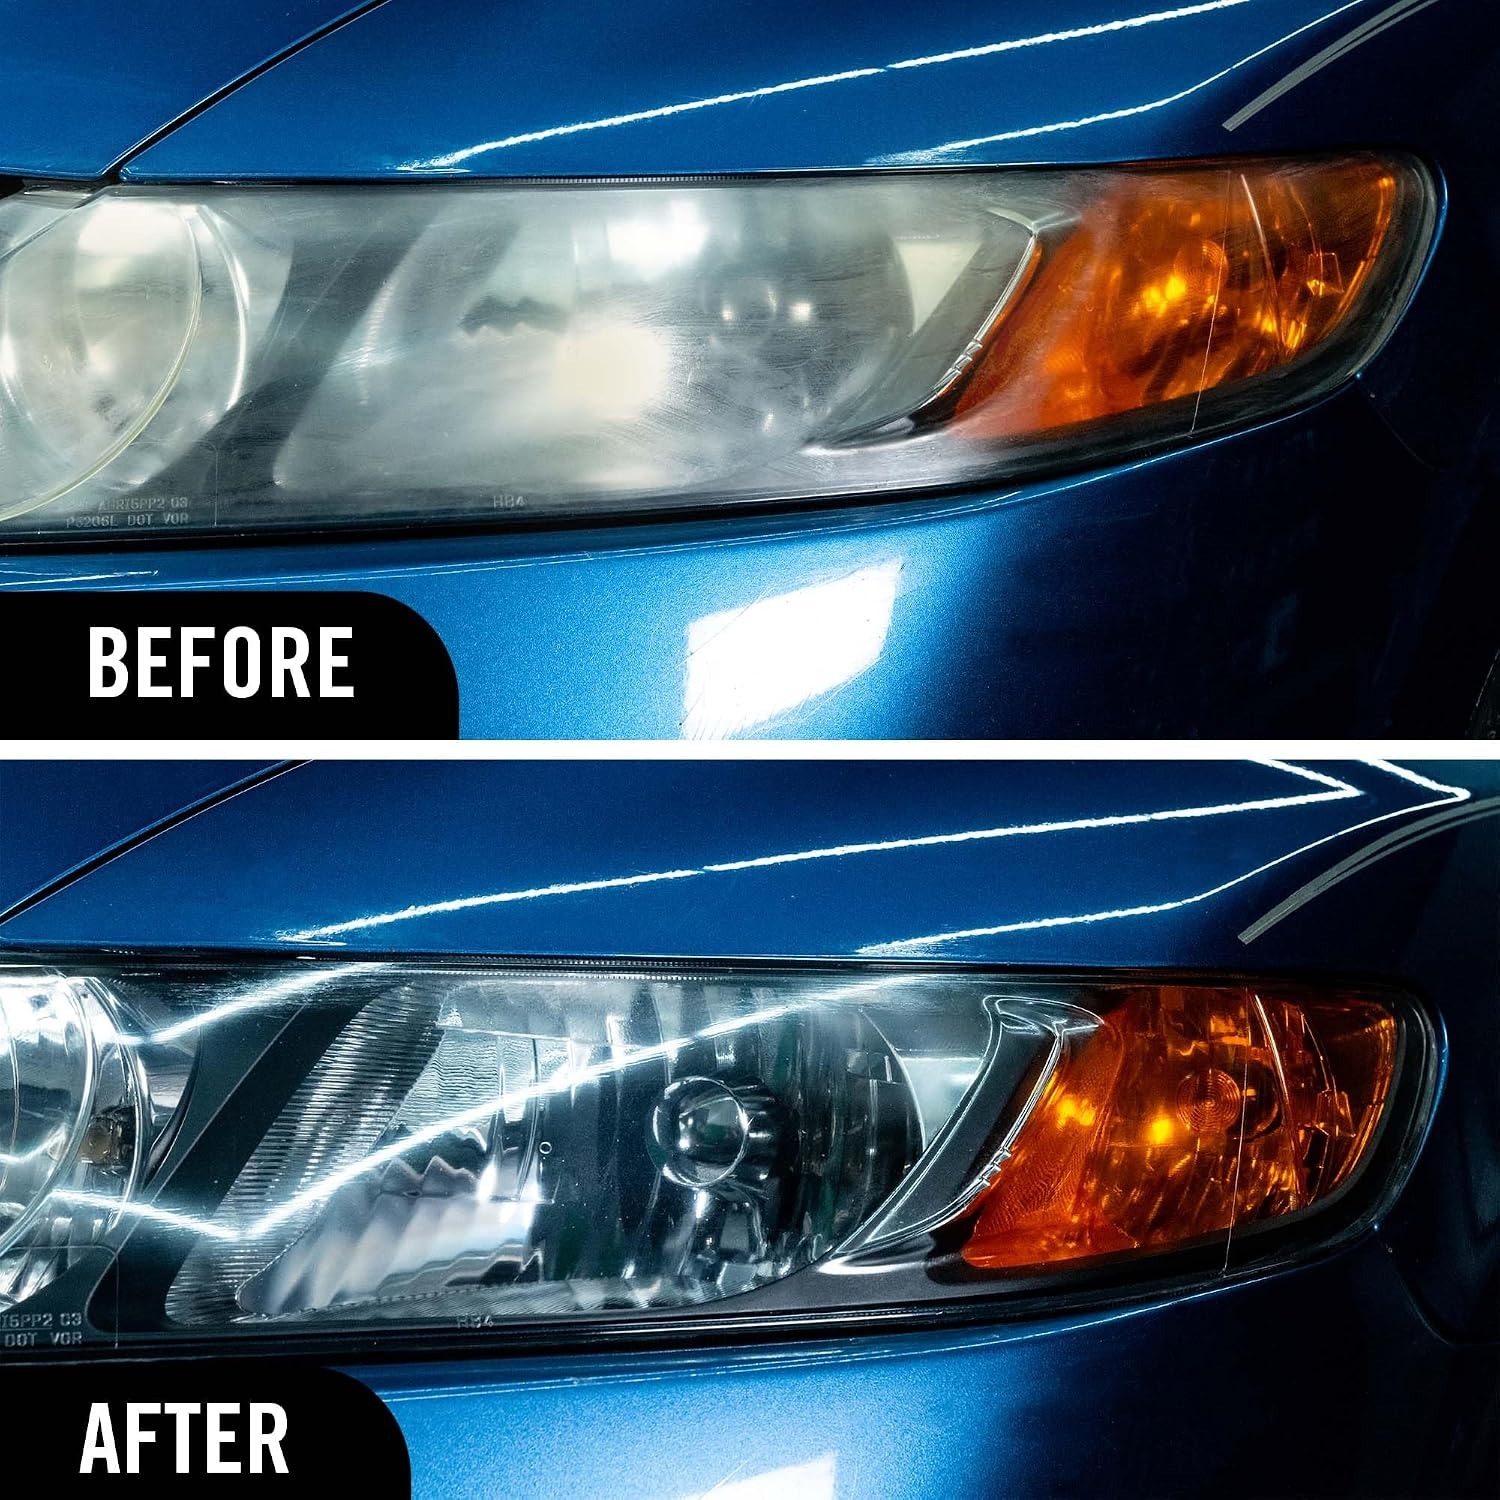
Bring dull, yellowed lamps back toward clear with a headlight lens restorer kit you can use by hand in an afternoon.

Multi-stage wet restoration pads, spray lubricant, a lens clarifying compound and sealing wipes work through surface haze and light scratching, then help shield the finished lens.

A headlight lens restorer kit for plastic lamp lenses that have gone dull, cloudy or yellowed with age and weather.

The kit holds multi-stage wet restoration pads, a spray lubricant, a lens clarifying compound and lens sealing wipes.

Everything is done by hand, so you do not need a drill, polisher or any other power tool.

Light hazing may clear with the clarifying compound alone, while deeper discolouration and scratching is worked through with the pads and lubricant.

It can also be used on plexiglass and other plastic surfaces, which makes it handy well beyond the car.

Headlight Lens Restorer Kit

Plastic headlight lenses do not stay clear forever. Sun, road grit, bug splatter and years of washing wear down the factory coating, and once that coating breaks up the plastic underneath starts to cloud and yellow. From a metre away the lamp looks grey and tired. Up close you can usually see fine scratching and a chalky film that no amount of soap will shift. This kit is made for exactly that problem, and it is designed so you can do the work yourself at the kerbside or in the driveway.

Headlight Lens Restorer Kit

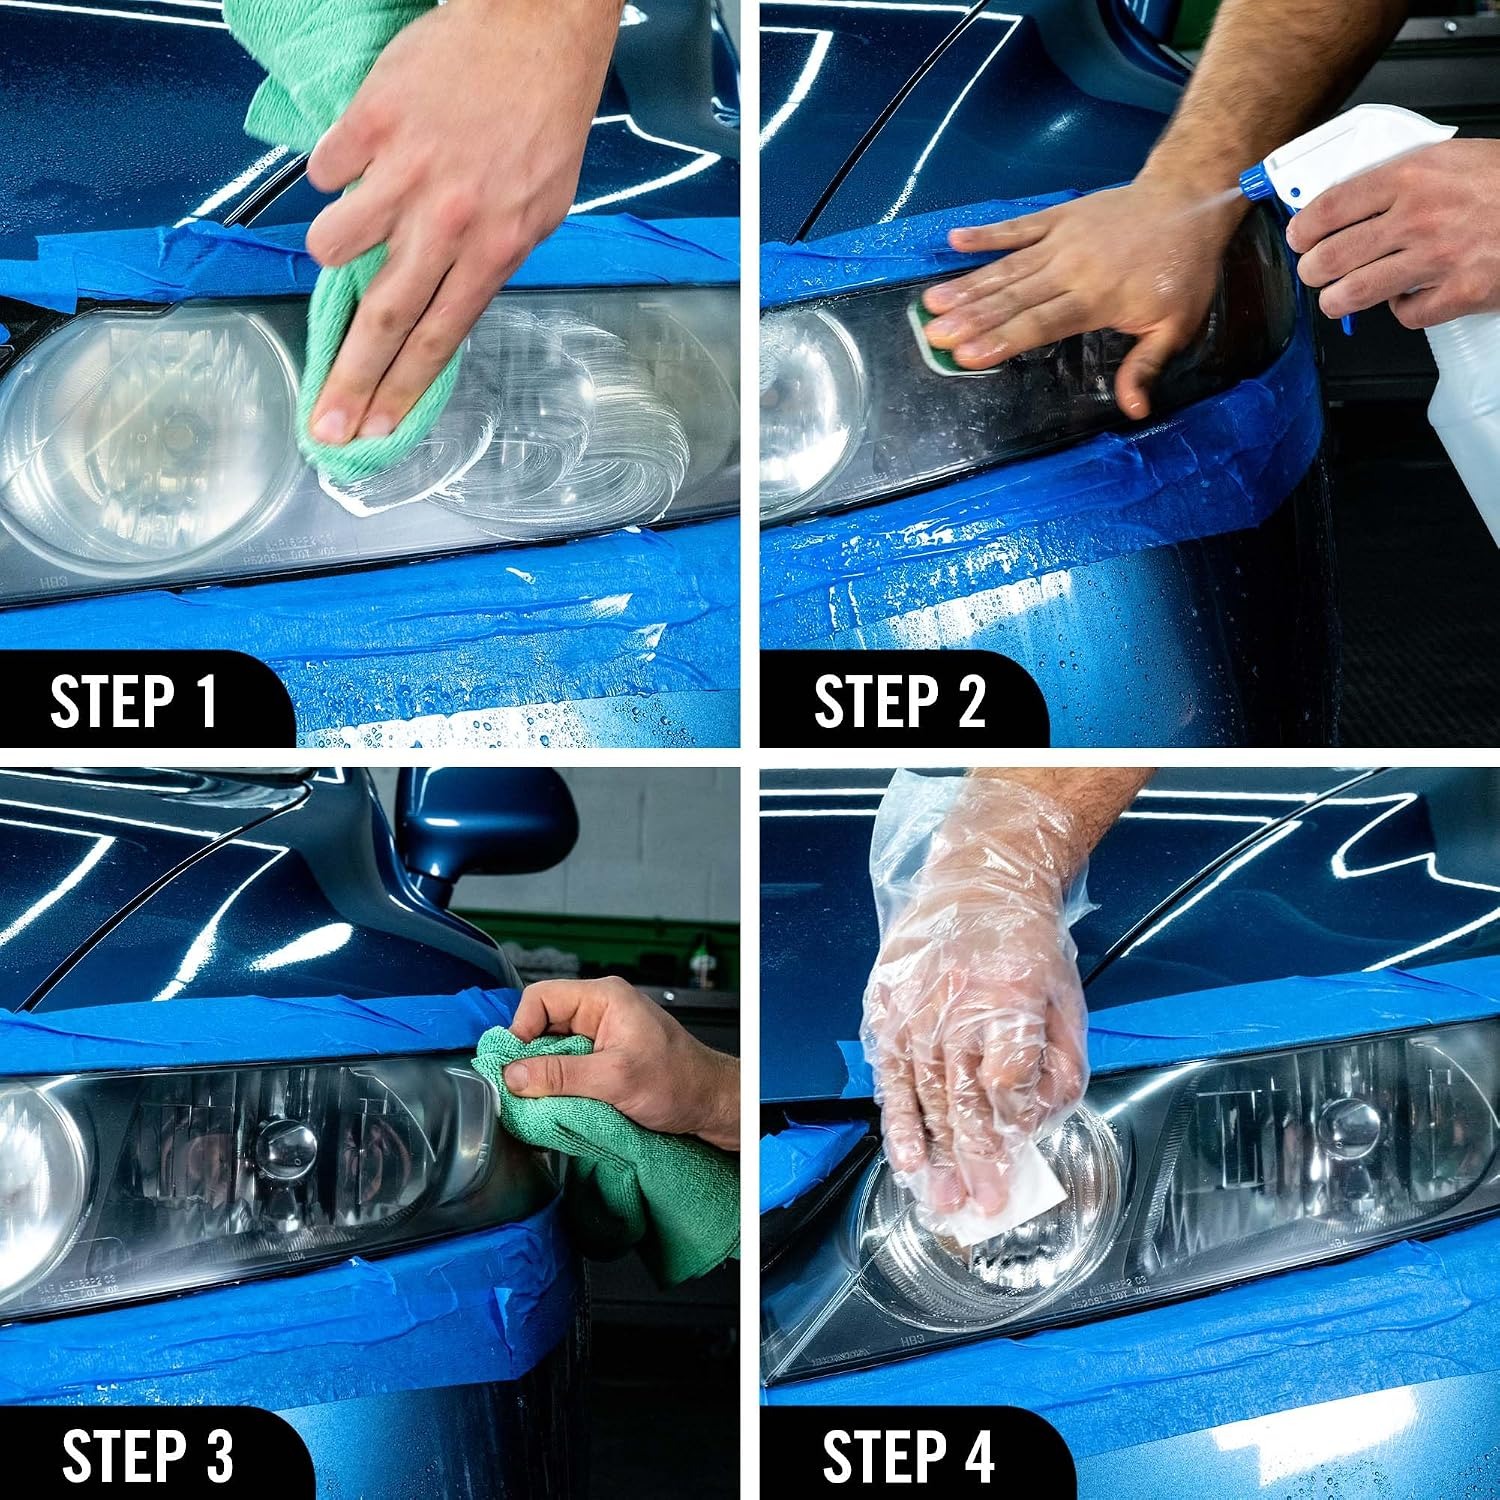
Inside the pack you get multi-stage wet restoration pads, a spray lubricant, a lens clarifying compound and lens sealing wipes. The idea is simple. You either polish away the surface discolouration with the compound, or, if the lens is further gone, you work through the pads from coarser to finer while keeping the surface wet with the lubricant. Each stage removes the scratch pattern left by the one before it, until the plastic is smooth enough for the compound to bring back clarity.

Headlight Lens Restorer Kit

The last step matters as much as the sanding. Once you cut back into bare plastic, the lens has nothing on it. The sealing wipes go on at the end to help protect the surface and slow the return of yellowing. Skipping that step is the most common reason a home restoration does not hold up, so it is worth taking the extra few minutes.

Headlight Lens Restorer Kit

No drill, polisher or compressor is needed. Everything in the kit is worked by hand, which keeps the pace slow and controlled. That is actually an advantage on plastic, because heat and speed are the two things that most often ruin a lens. You will want a roll of masking tape as well, since taping off the paint and trim around the lamp protects it from stray scratches and compound.

Results depend on the condition of the lens you start with. Surface haze and light scratching usually respond well. Deep cracks, moisture trapped inside the housing, a failed seal or damage on the inner face of the lens cannot be reached from the outside and will not be fixed by any polishing kit. Work on a small, low area first to see how your particular lens responds before you commit to the whole lamp.

Not sure yet? That is fine.

You can change your mind. This shop's own returns policy gives you 15 days from purchase to send it back in its original packaging with proof of purchase, and we refund the price you paid for the goods.

If it turns up faulty, damaged or not as described, that is on us. We pay the return postage and you can have a repair, a replacement or your money back, and your rights under the consumer protection law of your province or territory are unaffected. Read the full detail on our refunds and returns page, or ask us anything before you order.

Frequently Asked Questions

What does this kit actually do?

It is a headlight lens restorer kit for plastic lenses that have gone cloudy, dull or yellow. You remove the worn, discoloured outer layer of the plastic and then polish the surface back toward clear. A sealing step at the end helps protect the freshly worked lens.

What comes in the kit?

Multi-stage wet restoration pads, a spray lubricant, a lens clarifying compound and lens sealing wipes. Everything you need to carry out the restoration itself is included.

Do I need a drill or a polisher?

No. The whole process is worked by hand, which is one of the main reasons people choose this kind of kit over a machine-driven one. Working by hand keeps heat down and gives you more control over how much material you remove.

Is this the best headlight restoration kit for yellowed lenses?

It is a sensible choice for yellowing caused by surface weathering, because it combines abrasive pads, a clarifying compound and a sealing step. Whether it is right for your lamp depends on how deep the discolouration runs. Yellowing that sits inside the lens or in the housing will not respond.

How long does the job take?

Most people set aside an hour or two for a pair of lamps, including masking and clean-up. Badly hazed lenses take longer because you spend more time on the coarser pad stages. Rushing the sanding is the usual cause of a patchy finish.

Can I use it on just one headlight?

Yes, though doing both at once usually looks better. If only one lamp is weathered, matching it to the other takes a careful eye. Standing back and comparing them under daylight as you work helps.

Will it work on plexiglass?

Yes. The kit can be used on plexiglass and other plastic surfaces as well as headlight lenses. Always test on a small, out-of-the-way patch first to see how that particular plastic responds.

What about motorcycle or boat lenses?

It is suitable for plastic surfaces generally, so a plastic motorcycle lens or a plexiglass boat window falls within that. People often look for the best plexiglass restoration kit for exactly this sort of mixed use. Test a small area before working the whole panel.

Do I have to use the sanding pads every time?

Not always. The clarifying compound removes surface discolouration, and on lightly hazed lenses that may be all that is needed. If the compound alone does not clear things up, that is when you move to the wet restoration pads.

How do I know which pad stage to start with?

Start with the finest stage that makes a difference. If the finer pads are not cutting through the discolouration after a reasonable effort, step back to a coarser one. Working from coarse to fine afterwards removes the heavier scratch pattern.

Why does the lens need to be wet while sanding?

The spray lubricant keeps the surface slick, carries away the removed plastic and keeps the pad from clogging. A dry pad digs in and leaves heavy marks that are hard to polish out. Keep the lens visibly wet through every pad stage.

Should I mask the paint around the lamp?

Yes, always. Mask the paint and trim around the lamp with tape before starting. The pads and compound do not know the difference between lens plastic and clear coat, and a slip on bodywork is far harder to correct.

What is the sealing step for?

Once you have sanded and polished, the plastic is bare. The lens sealing wipes go on last to help protect the lens from yellowing again. Leaving the lens unsealed is the fastest way to undo your work.

Can it fix cracks in the lens?

No. Deep cracks cannot be fixed from the outside and no polishing kit will close them. If the lens is cracked, the lamp needs repair or replacement rather than restoration.

My headlight has moisture inside. Will this help?

No. Internal moisture points to a failed seal or a crack somewhere in the housing, and that is a separate problem. This kit works on the outer surface only, so damage or condensation inside the lens is out of reach.

What if the hazing is on the inside of the lens?

Any clouding on the inner face cannot be reached without opening the housing, which is outside what this kit does. If the outer surface already feels smooth and clear but the lamp still looks milky, the problem is likely internal.

How long will the result last?

That depends on the lens, your climate, where the car is parked and how often it is washed. The sealing wipes are there to help protect the surface, but no outdoor finish is permanent. Keeping the car shaded when you can will help.

Can I redo the restoration later?

Yes. If the lens starts to haze again, you can repeat the process, often with just the compound and a fresh seal. Heavier re-sanding is only needed if the discolouration has returned deeply.

Is this safe to use on glass headlights?

The kit is intended for plastic lenses, plexiglass and other plastic surfaces. Older glass lenses weather differently and are not the target of this kit. Check what your lenses are made of before you start.

Do I need anything that is not in the box?

Masking tape is the main one, plus a bucket of water, a clean microfibre cloth and somewhere out of direct sun to work. Gloves are a good idea if you would rather keep compound off your hands. Everything else is supplied.

Can I work in direct sunlight?

It is better not to. Sun dries the lubricant quickly and warms the plastic, which makes it harder to keep the lens wet through each stage. Shade or an overcast day gives you more working time.

How do I clean the pads?

Rinse them in clean water after use and let them dry fully before storing. Removing the plastic residue keeps the abrasive working properly. Let them air dry rather than sealing them away damp.

How should I store the kit between uses?

Keep it cool and dry with caps and lids closed so the compound and lubricant do not dry out. Leave the sealing wipes in their sealed packet until you need them. Store out of reach of children and pets.

Can a beginner handle this?

Yes. The hardest part is patience rather than skill. Mask carefully, keep the lens wet, work through the stages in order and do not skip the sealing step.

What if I sand too much in one spot?

Usually you can even it out by going back over the whole lens with that stage, then working forward through the finer pads again. Uneven cutting is the most common beginner issue and it is normally recoverable. Work in overlapping passes rather than small circles in one place.

How long will delivery take?

We dispatch within 2 working days. Delivery then takes up to 7 working days by tracked courier, anywhere in Canada. It is free on orders of $100 or more and a flat $25 below that, shown in your cart before you pay. You get a tracking number by email once the parcel is dispatched.

What is your returns policy?

Unopened kits in their original packaging can be returned within the published returns window. Get in touch before sending anything back so we can issue instructions. Once a kit has been opened and used, consumable items cannot be returned.

What if this kit is not right for my lamps?

Contact us and describe what your lenses look like, including whether the haze is outside or inside. If restoration is not the right answer for your situation, we would rather tell you that than take the order. If the kit has arrived and is unopened, we will arrange a return.

Is there a warranty?

No separate warranty is sold. Your provincial consumer protection law applies in full, and faulty items are put right. Contact us with your order number and a photo and we will sort it out.

Can I return it if it is not right for me?

Yes. You have 15 days from purchase to change your mind under our refunds and returns policy. Contact us first, keep the original packaging and leave the item unused until you are sure it suits.

Headlight Restoration at Home: A Practical Buyer's Guide

6 min read Online Auto Company

Why headlights go cloudy in the first place

Modern headlight lenses are plastic, not glass. Plastic is lighter, it is cheaper to shape into complex forms, and it does not shatter the way glass does. The trade-off is that it does not cope with sunlight on its own. From the factory, every plastic lens carries a thin protective coating designed to take the ultraviolet punishment instead of the plastic underneath.

That coating has a working life. Sun, heat, cold, rain, road salt, bug splatter, automatic car wash brushes and a few thousand kilometres of grit all chip away at it. Once it starts to break up, the coating goes patchy and the bare plastic beneath begins to oxidise. That is when the lens turns dull, then grey, then the familiar yellow-brown. Washing does nothing because the problem is not dirt sitting on the surface, it is the surface itself.

You will usually notice it first on the upper face of the lamp, the part angled toward the sky, because that is where the sun lands hardest. Cars parked outside year-round go faster than garaged ones. Front lamps go before rear ones. None of it is a fault, it is just what happens to exposed plastic over time.

What a restoration kit actually does

The honest description is that you are removing material. There is no liquid that chemically converts cloudy plastic back into clear plastic. What a headlight lens restorer kit does is cut away the damaged outer layer until you reach plastic that is still sound, smooth that cut surface down to a polish, and then put a fresh protective layer on top.

This kit handles that in a few steps. The lens clarifying compound tackles surface discolouration, and on a lightly hazed lens it may be all you need. The multi-stage wet restoration pads deal with deeper discolouration and scratching. They are used in order from coarser to finer, with the spray lubricant keeping the lens wet throughout. Each stage replaces the scratch pattern left by the previous one with a finer pattern, until the plastic is smooth enough for the compound to finish the job. Then the lens sealing wipes go on last to help protect the lens from yellowing again.

Everything is done by hand. No drill, no polisher, no compressor. Some people see that as a limitation, but on plastic it is often a benefit. Machines generate heat fast, and heat on a thin plastic lens can cause problems that are much harder to undo than a bit of extra elbow work.

Who this suits

If your lenses are hazy, chalky or yellowed on the outside and otherwise intact, you are the right customer. That covers an enormous number of cars between roughly five and fifteen years old, especially ones that live outdoors.

It also suits anyone with cloudy plastic elsewhere. The kit can be used on plexiglass and other plastic surfaces, so people reach for it on motorcycle screens, boat windows, trailer lamps and cabinet panels. The approach is the same, just test a hidden corner before you start on the visible part.

It does not suit a few situations, and it is better to know that upfront. Cracked lenses are beyond any surface treatment. Moisture inside the housing means a seal has failed somewhere, and polishing the outside will not change that. Clouding on the inner face of the lens cannot be reached without opening the lamp. If the plastic has gone so far that it is crumbly or deeply crazed, restoration will improve the look but not transform it. Results always depend on the condition you start from.

How to choose between kits

Three things separate a kit that works from one that disappoints.

The first is whether it includes abrasive stages or only a polish. Polish-only products are fine for very light haze but hit a wall quickly. Kits with graded abrasives can reach deeper damage. This one includes both the compound and multi-stage pads, which is why it covers a wider range of lens conditions.

The second is whether it seals. A lot of cheap options stop at the polish, which leaves bare plastic exposed to the same sun that caused the problem. The sealing wipes in this kit are the step that gives your work a fighting chance. Anyone comparing the best headlight restoration kit options should check for a sealing stage before anything else.

The third is whether you need tools you do not own. Drill-mounted systems can be quick, but they need a drill, a steady hand and some judgement about speed and pressure. A hand kit asks only for time. If you are doing this once on your own car, hand application is usually the easier call.

Doing the job properly

Pick a shaded spot and a day that is not baking hot. Wash the lamps and the surrounding panel first so you are not grinding grit into the lens.

Mask the paint around each lamp with tape before you start. This is not optional advice. A pad that slips onto clear coat leaves marks that take far more work to fix than the headlight ever would. Run the tape right up to the edge of the lens and give yourself a generous border.

Test on a small area first, somewhere low on the lens where a mistake will not show. This tells you how your particular plastic responds and which pad stage you actually need to begin with.

Then work through the stages in order. Keep the lens wet with the lubricant the whole time, use long overlapping strokes rather than small circles in one spot, and wipe the lens clean between stages so you can see what you have done. The surface will look worse before it looks better, that is normal. After the final pad, the clarifying compound brings the clarity back. Finish with the sealing wipes across the whole lens, including the edges.

Stand back and check both lamps side by side in daylight before you pull the masking tape off. If one looks duller, it is easier to go back over it now than to re-mask later.

Looking after the result

Once the job is done, the lens has a fresh protective layer on it, and how long that holds up depends on your climate, where the car sits and how it gets washed. Park in shade when you can. Avoid harsh solvents on the lens. A normal wash and dry is fine.

If haze creeps back after a while, you can usually refresh things with the compound and a new seal rather than going back to the abrasive stages. That is a much shorter job the second time around.

Store the kit somewhere cool and dry with the caps closed, rinse and dry the pads after use, and keep the wipes sealed until you need them.

The short version

Cloudy headlights are a surface problem on plastic, and surface problems can be worked on. This kit gives you the pads, lubricant, compound and sealing wipes to do it by hand, with no power tools and no specialist experience. Mask the paint, test a small area, keep the lens wet, work coarse to fine, and seal at the end.

It will not repair cracks, chase out trapped moisture or clean the inside of a lens, and how far it takes a badly weathered lamp depends entirely on how far gone that lamp already is. Within those limits, it is one of the more satisfying afternoons of car care you can spend.

Browse the shop

Not sure if your lenses can be saved?

Tell us what your headlights look like and we will give you an honest answer before you buy.

Ask us a question

Page summary

A headlight lens restorer kit for dull, yellowed or hazed plastic headlight lenses. The kit contains multi-stage wet restoration pads, a spray lubricant, a lens clarifying compound and lens sealing wipes. It is used entirely by hand and requires no drill or other power tool. The clarifying compound removes surface discolouration and may be sufficient on lightly hazed lenses, while the wet restoration pads are used in stages from coarse to fine, with the lubricant keeping the lens wet, for deeper discolouration and scratches. Sealing wipes are applied last to help protect the lens. It can also be used on plexiglass and other plastic surfaces. Results depend on lens condition.